Hot and Cold – Green Gazpacho and Chicken Empanadas

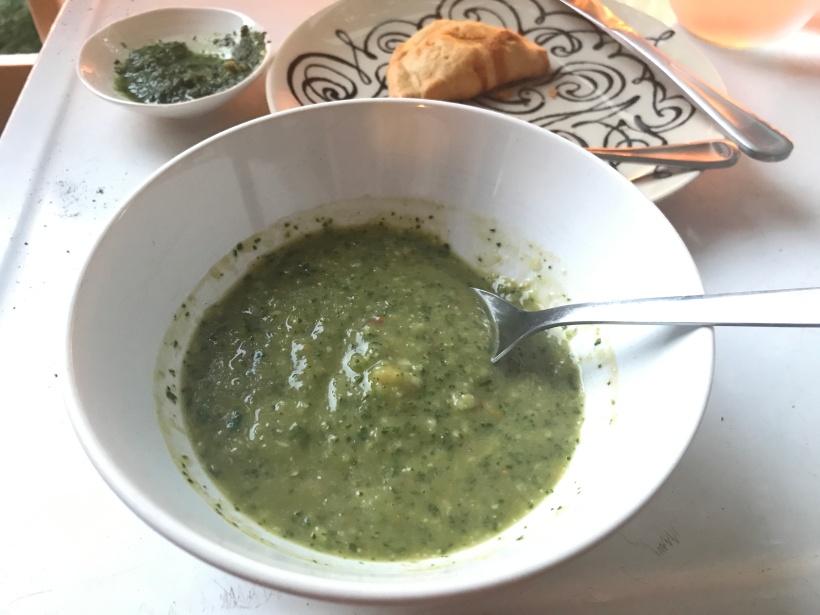
Summer is heating up, and the heat leaves me wanting something cool and crisp for dinner. I have been craving gazpacho for the last couple of weeks, and tonight I finally feel satiated. There is nothing like a chilled, flavorful mouthful of gazpacho to cool you down on a hot summer evening! I was inspired by the beautiful Green Gazpacho by Judy. I made a couple modifications, but this recipe was really wonderful!

I paired this green gazpacho with some Gluten-Free Chicken Empanadas. It might sound a little random, but the flavors actually really complemented each other nicely. I had some leftover chicken enchilada filling, so I spruced it up with more veggies, threw together some gluten-free dough, and baked them for 25 minutes. The result was a flavorfully spiced, slightly dense empanada paired with a light and refreshing cool gazpacho! I highly recommend making either recipe, or pairing them both together this summer. Hope you enjoy!

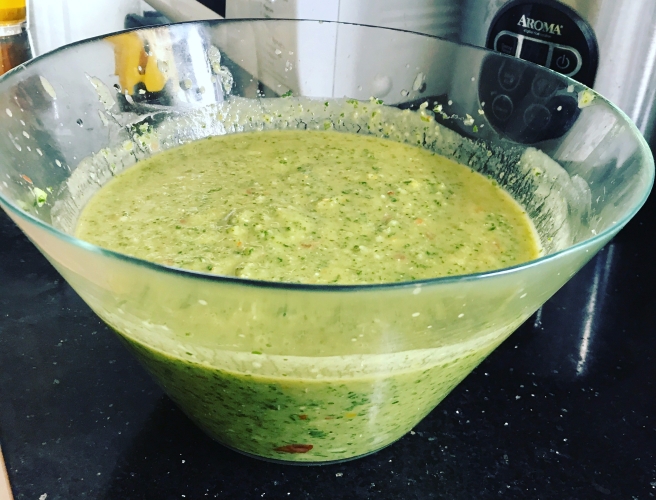
GREEN GAZPACHO RECIPE:

(adapted from I’m Bored – Let’s GoServes about 4-6

IMG_5890

INGREDIENTS

  • 2 avocados
  • 1 pint heirloom grape tomatoes
  • 1 English cucumber, sliced
  • 1 bulb fennel, trimmed, core removed
  • 2 stalks celery, sliced
  • 3 scallions
  • 2 garlic cloves, crushed
  • 2 cups of spinach, chopped
  • 1 ¼ cups of bunch basil, chopped
  • ½ a green bell pepper, chopped
  • 2 cups water
  • 2 limes, juiced
  • 1 Tbsp balsamic vinegar
  • 2 Tbsp olive oil
  • ½ tsp of cayenne pepper
  • ¼ tsp of ground ginger (powder)
  • Salt (about 1 tsp.) & pepper, to taste

INSTRUCTIONS

  1. Put cucumbers and tomatoes into a food processor and pulse until mixed. Then place the mixture into a large bowl.
  2. Next, process the fennel, scallions, celery, green pepper, and garlic, and add to bowl.
  3. Then process the spinach and basil and add to bowl.
  4. Add water and stir to combine all the ingredients.
  5. Add about 4 cups of the mixture in the bowl back into the food processor with the avocado, lime juice, vinegar, olive oil, cayenne pepper, ginger, salt and pepper. Process until smooth.
  6. Return the mixture to bowl and stir to well to combine all ingredients. Taste for additional seasoning.
  7. Chill for a couple hours prior to serving.

img_5872.jpg

GLUTEN-FREE CHICKEN EMPANADA RECIPE

Makes about 12 empanadas

IMG_5889

INGREDIENTS

For the Filling:

  • 2 small chicken breasts, cooked (cubed or shredded)
  • ¾ of a small can of enchilada sauce
  • ¼ of an onion, finely chopped
  • 2 scallions, chopped
  • ½ a can of black beans, drained and rinsed
  • ¼ cup of corn kernels
  • ½ cup of shredded cheese (mexican blend)
  • ½ red or green bell pepper, finely chopped
  • ½ a tomato, finely chopped

For the Gluten-Free Dough:

  • 1 ¼ cups of all-purpose gluten-free flour
  • ¾ tsp salt
  • 4 Tbsp cold, unsalted butter, cut into small cubes
  • 1 egg (½ for the dough, ½ for the egg wash)
  • ⅙ cup of cold water (plus a bit more for the egg wash)
  • ½ Tbsp white wine vinegar

INSTRUCTIONS

For the Dough:

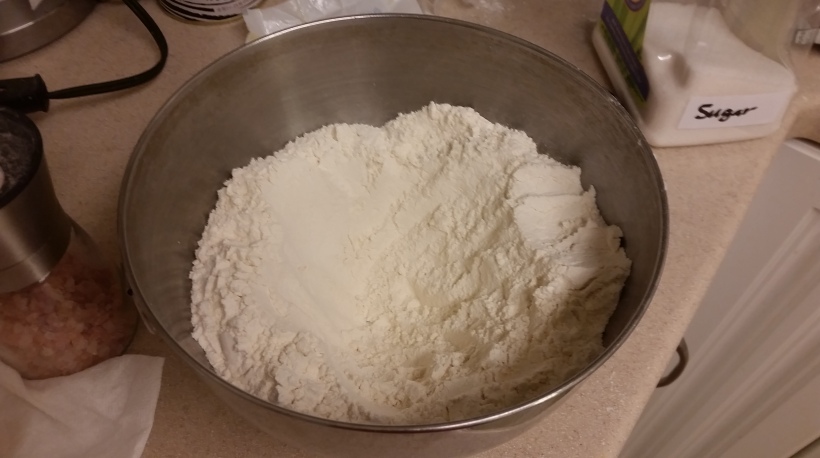
  1. In a medium sized bowl, mix the gluten-free flour and salt together with a fork.
  2. Place the cold butter cubes into the flour and pinch the flour and butter together to form crumbs, but not completely melt the butter.
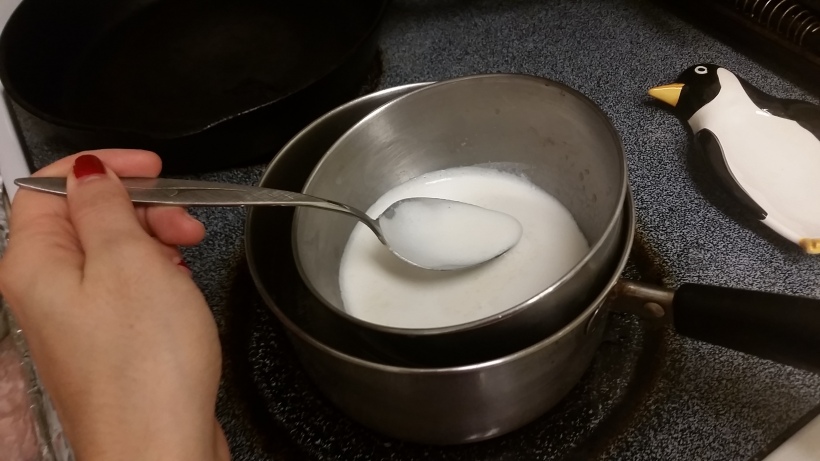
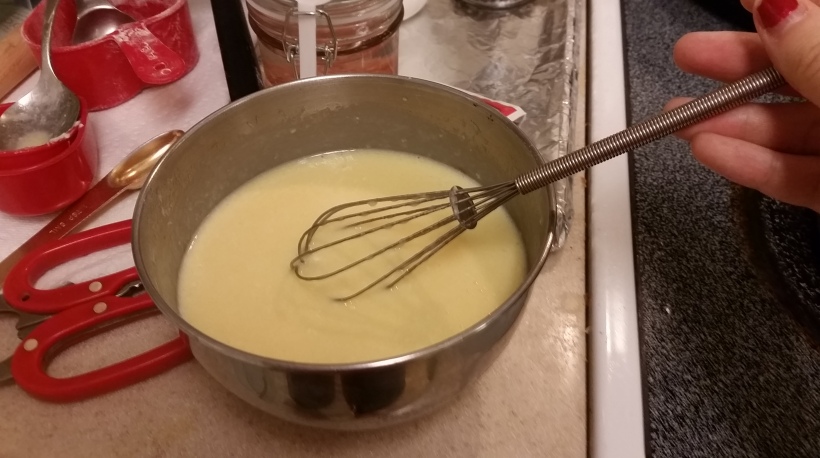
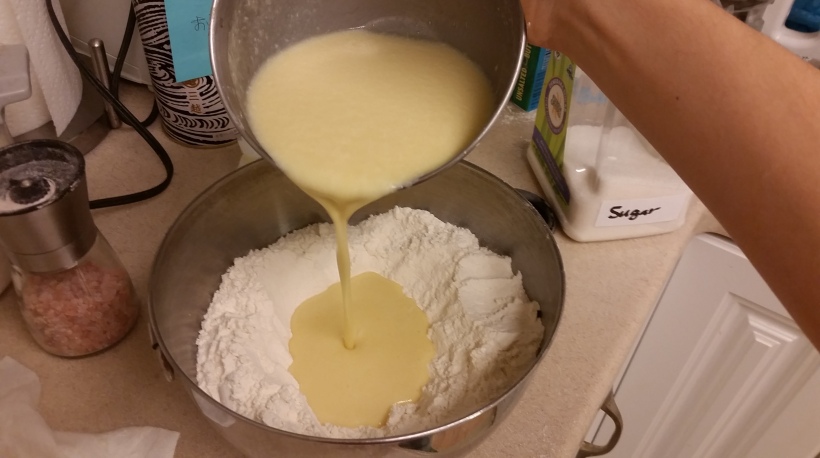
  3. In a small bowl, whisk together the ½ egg, ⅙ cup of water, and vinegar.
  4. Place the wet mixture into the bowl with the flour mixture and combine them with a fork until the incorporated.
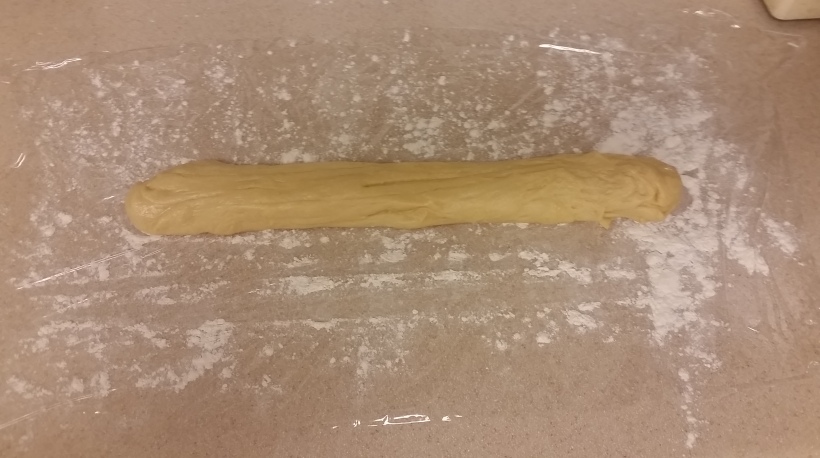
  5. Place some GF flour on the counter to create a work surface, and then put your dough on the counter. Press the palm of your hand into the dough and knead it until it turns uniform and you can roll it into one ball.
  6. Place the dough in plastic wrap and place it in the fridge to chill for at least 2 hours.

For the Filling:

  1. Finely chop all the vegetables and then chop or shred the chicken.
  2. Place all ingredients into a bowl and mix thoroughly.
  3. You may have leftover filling, you can always make a double batch of the dough!

To Form the Empanadas:

  1. Preheat the oven to 400 degrees.
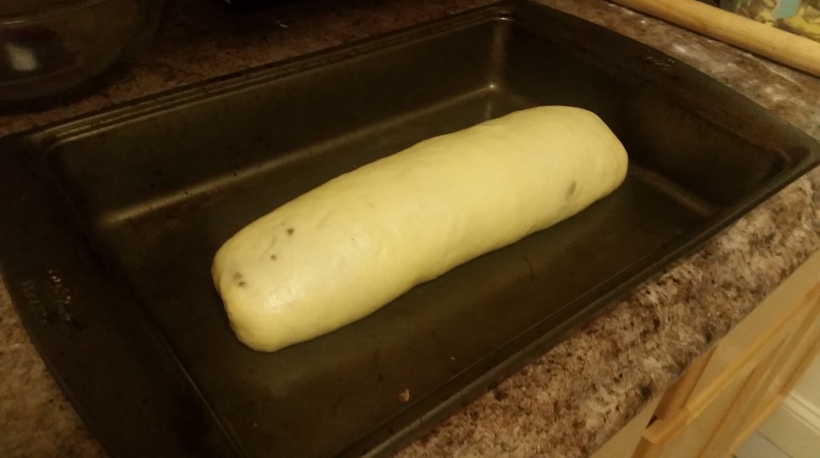
  2. Take the dough out of the fridge and roll it out onto a floured work surface. Form the dough into a long cylinder and cut it into pieces that are about 3 x 3 inches.
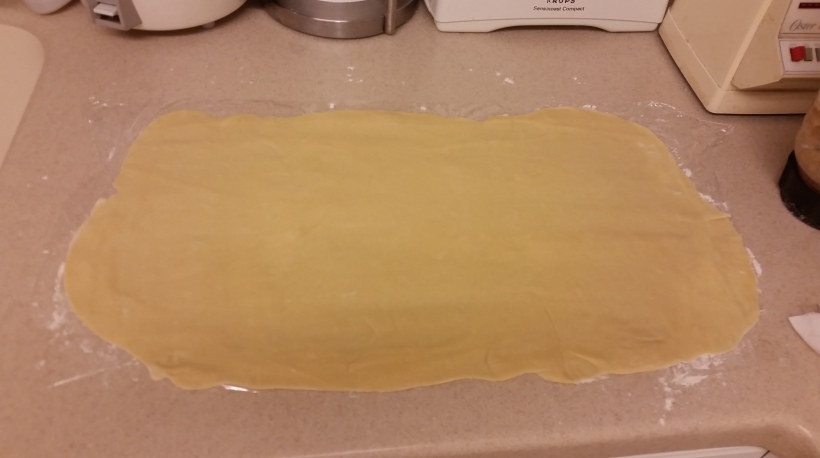
  3. Roll out the section of dough into a flat, circular shape (you can use a rolling pin or just flatten it with the heal of your hand).
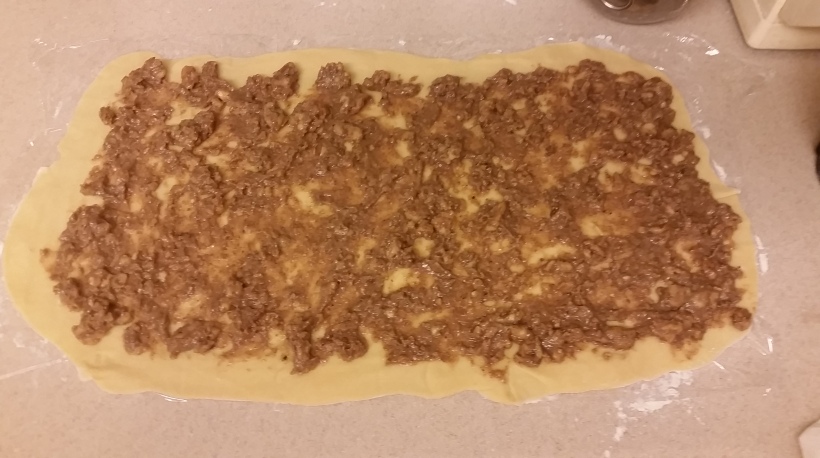
  4. Scoop about 1 Tbsp of filling into the center of the dough and fold the dough in half, pressing the edges together and sealing the pocket.
  5. Then roll the edges of dough inwards to form a half crescent.
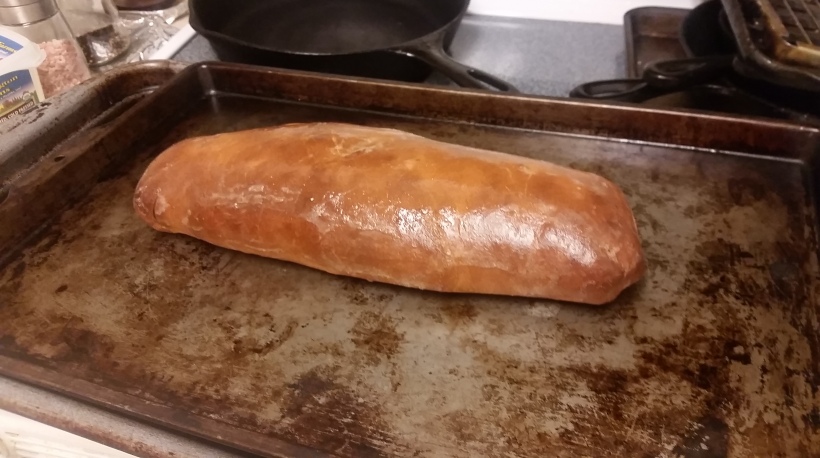
  6. Place the empanadas onto a greased baking sheet. Poke holes with a fork onto the top of the empanada to let some of the steam escape as they cook.
  7. Place empanadas in the oven and bake for about 25 minutes, or until golden brown. Allow them to cool for about 5 minutes before serving.

IMG_5887

IMG_5880 IMG_5884

Made with Love,

Anneli

Dinner for a Warrior

Every year (well, for the past two years), my boyfriend and I have had a bet on the Warriors Vs. Cavs Playoffs. Although neither of us have true skin in the game, our hometown loyalties have allowed us to engage in a pleasant rivalry where to loser has to cook the winner a fancy dinner. Well last year I got my chance at devouring a delicious meal cooked by my boyfriend, Sam, after the sweet victory of the Cleveland Cavaliers. But this year, unfortunately, this year I had to cook in defeat due the Golden State Warriors winnings (although, cooking is my happy place, so this “bet” is really a win-win for me no matter what… but don’t tell Sam that!).

When I asked Sam if he had any specific requests for this victory dinner, he replied with “fish, broccoli, and salad”. These are all fairly regular staples in his diet, so I didn’t want to make my normal salmon recipes this time. So since I had to make a “special” Warriors dinner this week, I had to really get creative. These dinners have to be fancy, and since I usually like to get fairly “fancy” in my kitchen (okay, not actually fancy, but I like to make slightly intensive meals when I can…), I knew this meal would be largely about color, flavor, and presentation. The latter being the hardest for me. Usually once I cook, I am so excited on the eating part that I don’t put too much effort into the presentation. But since this Warriors dinner had to be fancy, I decided to put a little more effort into the presentation. Although you could argue I still have a fair amount of work to do when it comes to presentation, I was definitely pleased with myself when it comes to flavor!

I spent the whole morning before work planning out this meal, making lists and even drawing out how I would plate the food. I then left work early to beat the after-work rush at the grocery store, and then spent a happy two hours in my kitchen putting everything together as I sang at the top of my lungs and swayed to St. Paul and the Broken Bones. (side note: if you have never heard of this band, stop reading this and go look them up. They are AMAZING!)

So what was this amazing Warrior-worthy meal I made? Great question! I put together a couple of different recipes I found (and, of course, added my own flare to each dish) to make Chili-Lime Halibut, Avocado Crema, Mango Salsa, Roasted Broccoli (my usual, go-to recipe), and Coconut Rice. All of this was served with a spinach, tomato, and goat cheese side salad and an appetizer of drunken goat cheese with almond crackers and cherries. It may sound fairly intensive, but it was actually fairly easy to put together, and all of the sweet, citrusy flavors melded together so well, it was incredible! I really recommend that you try and make it the next time you want to make a fresh, summery plate and impress someone with colors and flavors.

I hope you enjoy the recipe below!

INGREDIENTS:

Avocado Crema:

  • 1 medium avocado
  • ½ cup chopped cilantro
  • ½ tsp salt and pepper each
  • 1 tbsp fresh lime juice
  • ¼ cup plain greek yogurt
  • 1-2 tbsp water (optional, for thinning crema)
  • ¼ tsp garlic powder

Mango Salsa:

  • 1 – 1 ½ medium mangos
  • 3 tbsp fresh lime juice
  • 1 tbsp seeded and chopped jalapeño
  • ¼ tsp salt
  • 2 garlic cloves
  • 1 tbsp chopped cilantro
  • ¼ of a red onion, diced
  • ¼ of a small red bell pepper, diced
  • ½ tsp olive oil

Go-to Roasted Broccoli:

  • 6 cups of broccoli florets (about 2 crowns)
  • 1 tbsp of ground cumin
  • 1 tsp turmeric powder
  • 1 – 1 ½ tsp curry powder
  • 1 ½ tsp dried oregano
  • 1 tsp garlic powder
  • Salt and pepper to taste (I like a generous amount, about 1-2 tsp each)
  • 1 – 1 ½ tbsp olive oil )or enough to coat vegetables evenly)

Coconut Rice:

  • 2 cups white jasmine rice, uncooked
  • 1 can (14.5 oz) of regular coconut milk
  • 1 ¼ cups water
  • ¼ cup coconut water (I used Naked pure coconut water)
  • 1 tsp salt
  • ½ tsp sugar (optional)
  • ⅛ cup red onion, finely chopped

Chili-Lime Halibut:

  • 1 lb of fresh halibut
  • 1 tbsp lime juice and some lime zest (about ⅛ tsp)
  • 1 tbsp olive oil
  • ½ tsp chili powder (+ ½ tsp more for fish rub)
  • ¼ salt and pepper, each (+ more for fish rub)
  • ¼ tsp garlic powder (+ ¼ tsp more for fish rub)
  • ¼ tsp fish rub seasoning (+ ¼ tsp more for fish rub)


INSTRUCTIONS:

Avocado Crema:

  1. Combine all ingredients in a blender and blend until smooth and fully mixed.
  2. If your crema is too thick, you can add water in it to thin it out and help it blend better in the blender. Otherwise, you can omit the water. I also used a bit more lime juice to thin my avocado crema.

img_5403.jpg

Mango Salsa:

  1. Combine half of the cilantro, half of the finely chopped onions, and all other ingredients into a food processor.
  2. Pulse until all ingredients are mixed well and finely chopped (but not blended). You can pulse until you reach your own preferred chunkiness.
  3. Transfer to a bowl and mix in the remaining cilantro and finely chopped onions. Taste and adjust salt and pepper to taste.
  4. For best results, let the mango salsa sit for awhile before serving to that all the flavors can meld together!

IMG_5401

Go-To Roasted Broccoli:

  1. Preheat oven to 400 degrees.
  2. Chop broccoli into florets, so that they are sliced in half, and roughly the size of a silver dollar.
  3. Use a plastic bag (I usually use the vegetable bag, the one that my loose broccoli comes in), and place the broccoli in the bag. Combine all of the spices/herbs/salt & pepper into the bag and give them a shake around.
  4. Then pour in the olive oil and twist the bag closed. Give it a good shake so that all the broccoli pieces are covered in spices and olive oil.
  5. Spread broccoli onto an ungreased baking sheet and place in the oven for about 20 minutes. Make sure you flip once in the middle of baking so that the broccoli cooks evenly.
  6. *This method is my go-to method for almost all roasted vegetables, including potatoes. Cooking time, oven degrees, and spices used may vary, but using the bag to evenly coat the veggies in spices and olive oil is pretty key!  

IMG_5400

Coconut Rice:

  1. In a medium sized pot, rinse the jasmine rice several times until the water runs clear. Drain any excess water and add the coconut milk, water, coconut water, salt, sugar (if using), and chopped onions. Mix well until the coconut milk blends with the water.
  2. On high heat, allow the mixture to boil. Once it starts to boil, turn the heat down to low and cook covered for 20 minutes.
  3. Uncover and continue to cook for 5 minutes. Fluff and serve.

img_5404.jpg

Chili-Lime Halibut:

  1. Preheat oven to 350 degrees. Put a nonstick frying pan or cast-iron skillet pan on the stovetop and heat up on high heat. I like to put a bit of olive oil on the pan and heat it up, but don’t burn the oil, about 1 ½ tsp.
  2. Meanwhile, combine all ingredients into a bowl (except the fish and the leftover spices for the fish rub) and mix well with a fork. Set aside.
  3. Rinse halibut and pat dry. Take fish rub, salt, pepper, chili powder, and garlic powder and pat onto the fish to create a dry rub.
  4. Take a small spoonful of the chili-lime marinade and very lightly coat the dry-rubbed fish fillet.
  5. Once the pan is hot enough, use tongs and place the fish onto the frying pan/skillet, skin-side down. Turn sides after 30-seconds, making sure to coat all four sides of the fish (if your fish is thick like mine, otherwise you can do just top and bottom). You want the fish to be seared on the outside but not cooked through. Slightly browned, but not burnt.
  6. Transfer fish to a greased baking dish, and pour all or half of the remaining fish marinade onto the fish, making sure to coat it evenly.
  7. Place the fish in the oven for about 10 – 15 minutes. Check it to throughout, as cooking times may vary drastically (my own if kind of finicky).
  8. Once the fish is flaky and juice, it is ready to be devoured!

IMG_5405

Once all of these dishes were almost ready, I served an appetizer of cheese and crackers on my handmade cutting board that I NEVER let Sam use because I am too proud of how I made it using a router table. While he ate the cheese and crackers, I plated the food as expertly as my novice plating skills would allow me, and then we enjoyed a lovely dinner on the porch with the summer breeze!

So even though my home team lost in the finals to the Warriors, I still believe dinner was a definite win for both teams 🙂

Made with Love,

Anneli

Beet, Swiss Chard, and Goat Cheese Crustless Quiche

If you have ever been to my house in the mornings, you know that one of my favorite go-to breakfast recipes is quiche. While usually I dazzle my guests with a sweet potato crusted quiche (recipe to be posted soon), today I felt like trying something different.

I awoke this morning to a rumbling hunger in my stomach and a craving for beets. Don’t ask me why. Maybe it had something to do with the sleet hammering against my window and the need for some bright color on this gray day. Despite the wintry mix of delayed Spring outside, I was in a celebratory mood, so I trudged over to the grocery store and gave into my blood-red beet cravings!

One of my favorite things about quiche is that you can put virtually anything in it and it turns out pretty good! Have vegetables in your fridge that are going to go bad soon? Make a quiche! Have a random assortment of grocery items but too lazy to go to the store to buy other ingredients that will make those random items into a certain meal? Whip them up into a quiche! Living on a student budget but need some more protein in your diet? A quiche has a ton of eggs to make you big and strong for cheap!

For today’s quiche, I used beets, and then some random vegetables that I had leftover, including swiss chard, broccoli, zucchini, mushrooms, shallots, and garlic. My recipe is down below, but feel free to mix it up and get creative! Bon appetite!

Vegetable Crustless Quiche

INGREDIENTS

  • 8 Eggs
  • 3 small, Roasted Beets (I used pre-cooked beets)
  • 5 leaves of Swiss Chard (stems removed), chopped
  • ½ a Zucchini, cubed
  • ½ cup of Baby Bella Mushrooms, chopped
  • ½ – 1 cup of Broccoli, chopped
  • 1 Shallot
  • 3 cloves of Garlic, chopped
  • 2.5 oz of Goat Cheese
  • 1 tsp Dried Thyme, to taste
  • 1 ½ tsp Herbs de Provence
  • ½ tsp Garlic powder
  • ½ tsp Dried Oregano
  • ½ tsp Dried Basil
  • Salt & Black Pepper, to taste
  • 1 Tbsp Olive Oil
  • ¼ cup Cheddar Cheese, shredded (optional)

TO PREPARE:

Preheat oven 375 degrees (F) and prepare all of your vegetables.

IMG_5017

In a medium bowl, crack your 8 eggs and add all of the spices (Herbs de Provence, Garlic Powder, Thyme, Oregano, Basil, Salt, and Pepper). Scramble the eggs with a fork and set aside.

In a medium sized frying pan (preferably one that you can put in the oven as well, otherwise, you should also grease a pie pan), heat the olive oil over medium-high heat. Add in the shallots and garlic, stirring constantly so they don’t burn. After shallots are translucent (about 4 minutes), add the broccoli. Cook for another 5 minutes. Then add the mushrooms and zucchini, making sure everything is coated in olive oil (you may need to add more so the veggies don’t stick to the pan). Sauté for another 5 minutes.

Then add the chopped chard. Once all the vegetables are stirred and the chard begins to wilt, turn off the stove and mix the vegetables around so that they are evenly placed throughout the pan. You can add a little salt and pepper to your vegetables if you would like. *If you cannot put your frying pan in the oven, transfer the vegetables into your greased pie pan, otherwise, keep them in the frying pan.

Take your scrambled eggs and pour them into the frying pan (or pie pan) and mix things around gently to make sure the egg mixture covers the pan and vegetables evenly. Then sprinkle the cubed beets into the egg/veggie mixture evenly.

Take a small spoon and crumble the goat cheese into the quiche, again trying to distribute it evenly. If you are using grated cheddar, you can sprinkle it over the entire quiche in a very light layer. Lastly, sprinkle some cracked pepper over the quiche and put it in the oven for 25-30 minutes.

IMG_5018IMG_5021

Your quiche is done when the eggs are set (not jiggly) and, if you put some cheddar cheese on, the top of the quiche will be slightly golden brown. Now take a big slice and enjoy it!

IMG_5023IMG_5025

Made with Love,

Anneli

Coconut Mochi cakes for your Sweetheart!

Quick! It’s not too late to surprise your valentine with some sweet and chewy Coconut Mochi cakes! They are super easy to make (as long as you don’t try to #pinterestfail as hard as me and Anneli did yesterday), and even #glutenfree! I have no idea where my mom got this recipe and would make up a story, but you don’t have much time to start baking!

Coconut Mochi Cakes

Prep time: 10 min
Bake time: 30-40min
Bake temp: 350ºF

Makes about 1.5 dozen cupcakes

Ingredients:

  • 1/4 cup of butter, softened
  • 1 cup of sugar
  • 1 egg
  • 1 cup of milk
  • 1/2 cup of grated parmesan cheese
  • 1/2 cup of coconut flakes
  • 1 cup of Mochiko (sweet rice flour)
  • 1 teaspoon baking powder

Method:

Mix sugar and softened butter together first, until creamy. Then add everything else and stir. I told you this was easy!


Distribute in cupcake cups, and just keep in mind the cakes will expand a bit as they bake. I only fill the cups about 1/3 of the way, because I like my cakes to be flatter than a traditional cupcake. It adds extra chewiness and reduces bake time.

IMG_4726.gif
Trying to be fancy and make Madeleine shaped cakes. Word to the wise, stick with cupcakes!

Bake for 30-40 minutes until golden brown. Test with a toothpick. Let cool and then decorate if you are feeling ambitious!

With love,

Noms

Coconut Mochiko cakes.png

My Mother’s Ratatouille!

“Anyone can cook!” These are the famous words of Auguste Gusteau in the much-loved Pixar movie, Ratatouille. For those of you who know me, you know that my phobia of rats (passed on to me, oh so lovingly by my mother, who got it from her mother) can only be trumped by my passion for cooking, which is why this movie speaks to me. Just like Anton Ego, even the thought of ratatouille transports me back to my childhood. I suddenly smell the sharp scent of garlic coming from the kitchen, the sultry voices of Norah Jones or Billie Holiday drifting towards my ears. I can feel the fragile flakes of the Herbs de Provence roll and crackle through my fingers as the odor of lavender wafts towards my nose. But most of all, ratatouille congers a feeling of love, comfort, and happiness within my chest. It makes me feel at home and connected to my mother and grandmother. Two women who have been the most influential cooks in my life, and two women who have taught me that yes, anyone (even myself) can cook!

When I started to show a passion for cooking a couple of years ago, my mother collected a couple of family recipes and put them together into a beautiful cookbook for my brother and I. To this day, it is the most beloved cookbook that I own. The pages are covered with some of my favorite childhood recipes, melding the flavors of my French ancestry with my Hungarian heritage. The recipes contain family photos of that recipe’s originator. Of course, my mother’s recipe for ratatouille is in there, and next to it lies one of my favorite photos (pictured below). I feel that this photo has always captured her essence; youthful, happy, curious, beautiful, and creative.

img_4633  

Last week, Naomi and I decided to make ratatouille and eat it while we watched the Pixar movie with the same name. This movie, we realized, also has sentimental value for our relationship, as we watched it together at the start of our friendship when she helped me carry up a bookshelf to my second floor apartment when I first moved to Boston. This was also the first time I cooked for Naomi (I made fajitas that we had to eat off of the pan because I had no plates yet), and luckily my cooking skills have improved since then.

When I told Naomi we were making ratatouille from my mother’s recipe, she was quite excited (she is very familiar with my book of family recipes at this point). I have tried a couple different versions of ratatouille, and I must say that I believe my mother’s to be the most flavorful. The secret is not too difficult, you just need an entire bulb of garlic, and some fresh, fragrant Herbs de Provence. Otherwise, this recipe is really quite simple, so literally, everyone can cook it (unless you are allergic to garlic or eggplant).

Below is my mother’s ratatouille recipe.

Ratatouille

INGREDIENTS (for 6-8 people):

  • 2 large (or 4 small) eggplants, peeled and cubed
  • 2 summer squashes cubed or sliced (I also added a zucchini)
  • 1 yellow onion, chopped
  • 1 (28 oz) can of stewed tomatoes
  • 10-15 cloves of garlic, minced (I used an entire bulb of garlic)
  • Herbs de Provence, to taste (I use a lot, and I prefer this spice bought in bulk, as it is more fragrant)
  • Salt and Pepper, to taste
  • ¾ cup of fresh flat-leaf parsley, chopped
  • ½ cup of fresh basil, chopped (optional, but it adds nice flavor)
  • 4-6 tablespoons of Extra Virgin Olive Oil
  • Goat cheese (optional)

*Ratatouille is wonderful on its own, or you can eat it as a side dish with chicken and rice, or any other meal that you prefer!

img_4575

TO PREPARE:

Chop all of your vegetables.

img_4578      img_4582

This recipe calls for an insane amount of garlic. I prefer to crush mine with a knife, peel off the skin, and then chop it all up (like this video below). It ends up preserving a lot of the natural oils that you would usually lose by using a garlic press. However, my mom uses a garlic press, so you can do whatever is easier.

Once everything is prepared, pour 1-2 tablespoons of olive oil into a large dutch oven or pan. Saute the onions and garlic on medium heat until soft, but not browned (maybe 5 minutes).

img_4586

When onions are soft, add the cubed eggplant, summer squash/zucchini, and 4 more tablespoons of olive oil. Add in the salt, pepper, and Herbs de Provence. (Naomi taught me about Salt Bae, so below is my attempt at “Herb Bae”.)

l0extxylvw5zep3es

Saute (stir) the vegetables until they are soft (about 2 minutes) and they are all coated in olive oil and seasonings (you may need to adjust the amount of olive oil, since eggplant soaks it up). It should look somewhat like this:

img_4594

Once vegetables are coated and spiced, add stewed tomatoes (enough to add color and texture, but not so much to make it soupy). Mix the tomatoes in with the vegetables so that they are distributed evenly.


26gsooyd0bstbqqya

Cover with a tight lid and simmer on low heat for about 20 minutes, or until the vegetables are cooked through and soft.

Add fresh herbs (parsley and basil) and cook for about 5 more minutes.

ratata

Et voilà! You have just made ratatouille!

img_4615

You can serve it with goat cheese, with warm, crusty bread, or as a side dish to your favorite meal.

At the back of my mother’s cookbook, she reminds me that, “For best results, prepare all recipes with love!” Bon Appétit! 

Posted with love,

Anneli

Croatian Nut Roll!

“What traditional dish does your family make for the holidays?” This has been my favorite question to ask people this holiday season. I love the *dreamy look * that people get as they go down memory lane to search for the answer!

I actually didn’t think my family had any hard-fast traditions – We tend to just cook whatever is fresh and looks good that year – but then my dad sent me a link to this Croatian Nut Roll recipe and all the memories came flooding back!… Waking up at my Grandma’s house to the smell of warm cinnamon and brown sugar, and polka music plucking away on the radio downstair *dreamy look*

img_1814
Croatian Nut Roll (“Povatica”) – Rich dough rolled thin and filled with a mouthwatering walnut, brown sugar, and cinnamon spread.

Nut roll had always been a staple at Christmas growing up, baked by my Croatian Grandma. Even after my Grandma passed away, my Great Aunt Helen kept the tradition alive, baking nut roll each year and even sending them across the country for us to enjoy when we weren’t able to spend Christmas together. This will be our second Christmas since Aunt Helen passed away, and it seemed like the right time to pick up the tradition again.

13658402_628753053966811_266545233_n
The Smith Sisters, second generation Croatians from Western Pennsylvania.  Grandma Pauline is second from the right. Aunt Helen is next to her, linking arms.

The nut roll recipe linked above gives a great explanation with plenty of photos along the way, so I recommend reading it too (it’s an entertaining read anyways!). Here is my version of the recipe, with some slight modifications. Try it out and let me know what you think!

Croatian Nut Roll (Povatica)

Makes 2-3 nut rolls.

Soundtrack while you are baking: Kockare –Mangupe, Dusan Jovanovic & His Tamburitza Orchestra “Orao”. Check out full Tamburitza! Album on Spotify.

Ingredients

For the dough:

  • 2 tsp (1 packet) yeast
  • 1 cup milk, warm
  • 1/2 cup sugar
  • 2 eggs, room temperature
  • 1/4 cup butter, softened
  • 1 tsp salt
  • 4.5 of flour

For the filling:

  • 4 cups whole walnuts
  • 1 cup brown sugar
  • 2 Tbsp warm butter
  • 2 tsp cinnamon
  • 2 tsp vanilla extract
  • ¼+ cup milk
  • Sprinkle some salt to taste

Method

For the dough:

Proofing Yeast: When making dough, I always “proof” the yeast before mixing it together with the other ingredients. “Proofing” just means you are making sure those little guys are still alive to do their job and make the dough nice and fluffy. Mix the yeast with some warm water or milk and wait 5 to 10 minutes until you see a frothy layer appear at the top. Sometimes I find it hard to tell if the yeast is working so I have a couple tricks to help it get started: 1) I usually add a bit of sugar to give the yeast something to eat while it is waking up; 2) I heat up some water in a separate pot (not too hot!) and then put the bowl I am working in right on top to make a sort of double boiler. This keeps the yeast mixture at the right temperature, especially if it’s winter and chilly in the house. Dipping a finger in the mixture, it should be quite warm, but not too hot to touch.

2016-12-25-12-55-23
The yeast: Proof that it’s proofed.

While the yeast is proofing, *measure 4.5 cups of flour in a large bowl. Create an indent in the flour where we will later pour the wet ingredients. Set aside.

*When measuring flour for baking I always spoon the flour into the measuring cup, rather than just dunking the whole measuring cup into the flour. Check out this link to nerd-out some more on how to measure flour.

2016-12-25-13-06-29

Once the yeast mixture is showing a nice frothy layer, add in the sugar, eggs, butter and salt, and whisk together.

2016-12-25-13-05-39

Pour these wet ingredients into the flour crater you made earlier and start mixing with a spoon from the center of the bowl, slowly incorporating the flour from the sides.

2016-12-25 13.06.57.jpg

Once the dough starts to hold it’s shape, flour up your hands and start kneading the dough until it is a nice elastic ball. You can sprinkle a bit more flour to keep the dough from sticking to the bowl/your hands, but don’t overdo it.

Let the dough rise for 1.5 hours in a warm place. I keep it in the same bowl and just coat the bowl with a bit of oil so that the dough doesn’t stick too much as it grows in size.

For the filling:

I actually made double the amount of filling called for in the original recipe I was following. Sometimes more is more  😉

The walnuts I used came from my dad’s walnut tree in Idaho. He shipped me a box of whole walnuts, which I then had to go cavewoman on to smash them open with a wooden rolling pin. Then after I baked them into a nut roll, I wrapped it up and shipped it right back to my dad! Dad is calling it the “Idaho boomerang”. Lol.

Add walnuts, brown sugar, butter, cinnamon, vanilla extract, and milk to a food processor and blend! The mixture should be kind of like a paste, easily spreadable, but with plenty of chunks of walnut still left. You can add a bit more milk until you get the right consistency.

Assemble & Bake:

Lay out a sheet of plastic wrap and lightly flour it. Split the dough into 2 or 3 even sized balls, and pick one to start with. I started rolling the dough by using my hands to roll it out into a rope.

2016-12-25 16.34.53.jpg

Then I used the rolling pin to flatten it out as much as possible.

2016-12-25 16.39.42.jpg

Spread the walnut filling all over from edge to edge. Try not to eat all the filling as you go!

2016-12-25 16.45.57.jpg

Then start rolling up the dough from one end. At this point I picked up the plastic wrap right under the dough and pull it in the direction I was rolling, and in one smooth motion it rolled right up!

nutrolling.gif

Pinch the ends shut, and really give it some attention so none of that delicious filling escapes. I also pressed along the lengthwise seam to try and seal everything up. Place the roll seam-side down in your pan and let it rest 30 minutes+ before baking.

2016-12-18 19.01.40.jpg

Preheat oven 350ºF and bake 35-40 minutes until the roll is nice and brown. Coat it with some butter while it is still warm.

20161225_181326.jpg

Et voile! You are done! Go dance a couple polkas while the roll is cooling, and then gather everyone around to dig in. Let me know in the comments section how it goes!

IMG_71871.jpg
Dad approves! 🙂

Posted with Love,

Noms